As sales are scanned through the till they will appear in the transaction window in the center of the screen.
The most recent / current sale will be highlighted in green. This is called the “Committed Line” This is the only part of the sale that can be changed.
To delete the last scanned item (highlighted in green).
- Press VOID
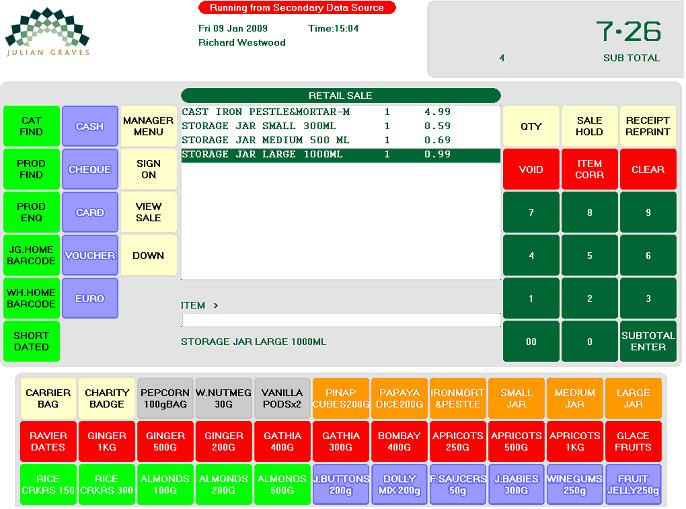
To delete an item earlier in the sale
- Press VIEW SALE then VIEW SALE again to move up or DOWN to move to and highlight the desired product in green.
- Press ITEM CORR
The correction will appear at the bottom of the transaction window.
To delete entire transaction:
- Press SUBTOTAL/ENTER to move all products from the tender screen.
- Press VOID
To discount a MULTIBUY promotional item:
- Press SHORT DATED
Till will prompt “Next item will be Short dated”
- Scan Item. Till will request a new price for short dated item.
- Enter the new price
NB. We use short dated for this action to prevent the product scanned from working as part of a multibuy offer for this sale.
To Refund an item once sold.
- Scan Item to be refunded. This will show as a sale initially.
- Press MANAGER MENU
- Select REFUND GOODS from the Retail Sale Menu
- Press SUBTOTAL/ENTER
- Continue with sale in the usual way
IMPORTANT
When giving a refund whether it be on a single product or multiple products, all items need to be scanned in first and discounts applied if they were given in the initial sale. Once all items have been entered and discounts applied, then go to MANAGER MENU and select REFUND GOODS.
Do not scan and refund items individually as any offers will not be contained and the balance to that the customer initially paid will differ.
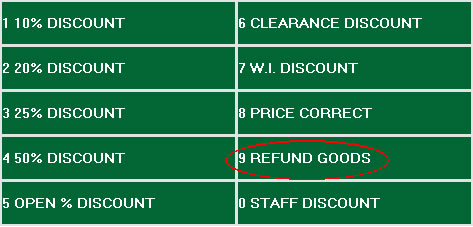
Discounts are to be done through the Retail Sale Menu on the MANAGER MENU button.
This is primarily for reducing the price of short-dated items, however it can also increase the cost of an item should it be under priced.
- Scan Item
- MANAGER MENU button.
- Select PRICE CORRECT
- Enter the new sale price, NOT THE DIFFERENCE.
- Press ENTER and continue with sale.
To open the cash drawer:
- Press MANAGER MENU
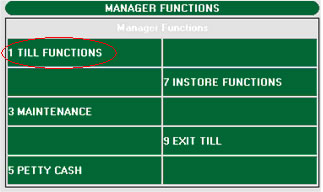
- Select TILL FUNCTIONS
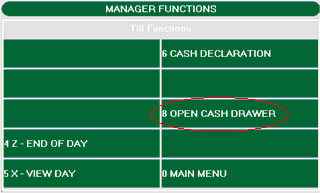
- Select OPEN CASH DRAWER
- The cash drawer will open and a receipt slip stating ****NO SALE**** will be printed off.
It is always wise to keep the “NO SALE” slip as a record of activity. The till keeps a record of who was logged onto the till then the drawer was opened